|
|
E-CELL2 User's Manual
|
[Chapter 1 Installation: Chapter 2 : Chapter 3 : Chapter 4 : Chapter 5 ][ Top ] |
E-CELL1 is a kind of whole-cell-simulation software for Linux, which has been developed by Professor Tomita's group at Keio University. The E-CELL2 system is an open source project which aims for realizing the environment better than E-CELL1 on the multi-platform (MS-Windows, Solaris, Linux, ...). Now, MS-Windows (2000/NT/98/XP) is targeted as a platform for E-CELL2 to be ported.
The E-CELL2.20 system, which is distributed this time, achieves these functions below;
Simulation environment in E-CELL2 is composed of main E-CELL2 application software and attached tools, and software by these third parties below:
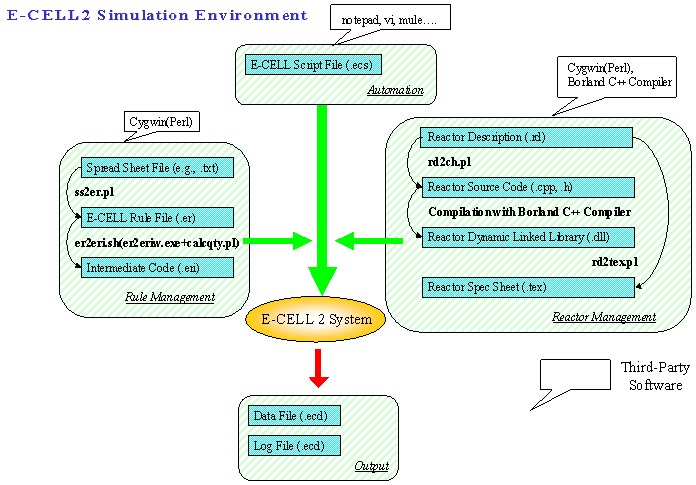
Java development environment is needed to revise the E-CELL2 GUI code or to compile computational engine part other than reactors. As Java interpreter, Java Runtime Environment (over 1.3.0) is enough for using only GUI, but installation for Java2 SDK is explained in this manual.
Be sure to install Cygwin because it is required for using tools to support modeling on E-CELL2.
Borland C++ Compiler is required when a chemical reaction formula is newly designed and implemented other than the chemical reaction formulae equipped as standard (reactor). It is not necessary to install this to see E-CELL2 demonstration only.
Let's prepare for starting up the E-CELL2!
In E-CELL2, it is needed to edit files or execute programs using the command line. The console window, in which commands are typed is called ``command prompt''. How to start up command prompt is explained for users who are not familiar with using commands.
For Windows98, from Start menu, point [Program], then chose [MS-DOS prompt]. (for NT, [Command Prompt]; for Windows2000, [Accessory]->[Command Prompt]; for XP, [Start]->[Command Prompt]) The console window which is called after clicking the icon is command pronpt.
Cygwin, which will be introduced later, is software which provides UNIX-like command line. In this manual, most of the operation with command line is explained using Cygwin. These are, however, several cases which command prompt is useful, so read back this section if you forget how to start up the software.
Set up for the PATH environmental variable appropriately is needed to make a program executable by command line from anywhere in your PC. The way to configurate it setup depends on each Windows OS. We will explain it below, so read back this section if you forget how to setup.
For Windows98, open the system configuration like C:\AUTOEXEC.BAT with Windows text editor like Notepad. This file cannot be opened by double-clicking in Explorer.
Add a line starting with "PATH=" to this file. Note that "C:\PROGRAM FILES\Foo" will be "C:\PROGRA~1\Foo" if your Windows does not support the long filename.
For WindowsNT or 2000, right-click on the [My Computer] then open system property by [Property], then set [PATH] of [system environmental variable] by choosing "Environmental Variable" of "Details" tab.
For WindowsXP, open [Control Panel] from Start menu. Click [Performance and Maintenance]. Clicking on [System] will open system maintenance window. Click [setup details] tab, then click [Environmental Variable (N)] tab. Then click [Path] in [System Environmental Variable (S)], then click [edit (I)] button below the window. Add suitable description in [Variable (V)] column.
Describe as below to modify the PATH variable
for the program bar.exe in "C:\Program Files\Foo".
(Note that this is not case-sensitive on the Windows OS level.)
PATH=%PATH%;C:\Program Files\Foo
If additional description should be added, use ";" for the separator. Reboot the computer to make the change effective.
To examine if the PATH variable was property configured, open command prompt and type;
The PATH variable will be displayed.C:> path
Type
to quit command prompt.C:> exit
Set up for the PATH of Cygwin, whose installation procedure will be explained later, is elucidated here. If you forget the way to set up for the PATH after you have installed Cygwin, read back this section and confirm the explanation.
Add description of environmental variables in a batch file, cygwin.bat, which is in the directory
which you installed Cygwin.
PATH=%PATH%;Program Files\Foo
Or create .profile under the home directory of Cygwin (the directory right after you start Cygwin)
then describe as follow;
PATH=$PATH:/cygdrive/c/Program\ Files
export PATH
Note that it will be recognized as
under the Cygwin environment. Also, note that the environment you add on Cygwin is not effective outside the imaginary file system of Cygwin./cygdrive/c/Program\ Files/Foo
E-CELL2 can be used either from GUI or command line. If a simulation is done on its GUI, Java Runtime Environment (JRE), which is Java interpreting environment, must be installed and configured property. If you just want to see E-CELL2 demonstration, use standard reactors or add user reactor of user definition, you don't need to install Java2 SDK. Install JRE if it is needed.
On the other hand, Java environment is needed to modify its GUI or re-compiling E-CELL2 engine. Installation of not JRE, but Java2 SDK will be explained here.
If you install only JRE, install it using a down-load installer from Sun Microsystems, Inc. (http://java.sun.com/) or by clicking the link below to start up the installer with referring to the following. If you already have (instruction of Java2 SDK installation) installed Java2 SDK, JRE is also accompanied and installed.
It was confirmed that E-CELL2 stably works primarily under Java2 SDK 1.3.0_02. (Running E-CELL2 is probably possible under Java2 SDK 1.3.0 or later) The installer for Java2 SDK 1.3.0_02 is attached to this CD-ROM.
Install Java2 SDK by clicking the link below or by downloading the corresponding installer from Sun Microsystems, Inc. (http://java.sun.com/). Similarly, clicking the link below can also start up the JRE 1.3.0_02 installer. To install JRE, refer to the installation of Java2 SDK.
 Install Java2 SDK from CD-ROM
(select " Run this program from the location " and click " OK ")
Install JRE from CD-ROM(select "Run this program from the location " and click "OK ")
Install Java2 SDK from CD-ROM
(select " Run this program from the location " and click " OK ")
Install JRE from CD-ROM(select "Run this program from the location " and click "OK ")
Start the installer of J2SDK up by clicking the icon below in CD-ROM if you don't click the link.

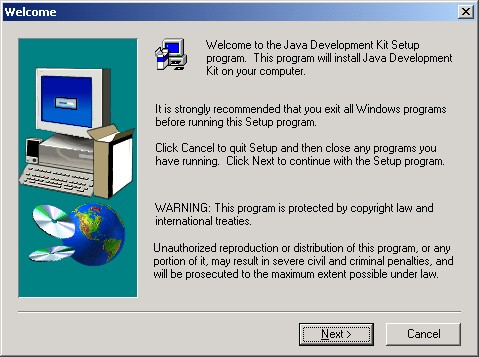
After the installation is prepared by Java2 SDK installer, the window below appears. Click " Next " button to go next.
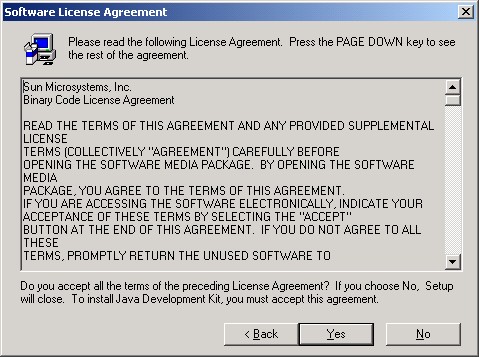
Product license consent contract by Sun Microsystems, Inc. will be displayed. Click " Yes " if you agree.
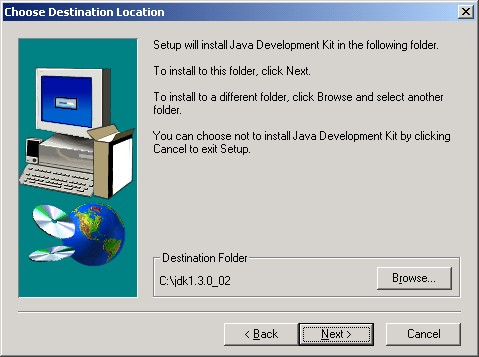
It will be installed in " C:\jdk1.3.0_02 " by default. If you want to choose another directory, specify it using " Browse " button. Don't forget the directory because it will be needed later to set up the PATH.
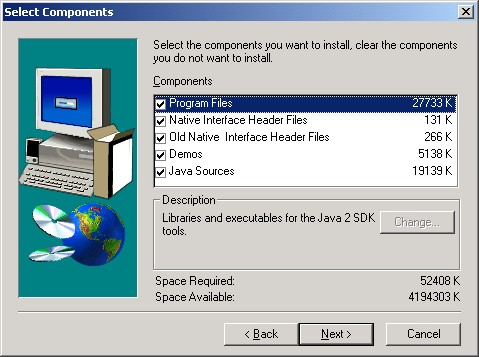
Select the components to be installed. The items, or " Program Files " and " Native Interface Header Files ", must be selected for future modification of GUI and re-compilation of the E-CELL2 core. Click " Next " to continue installation.
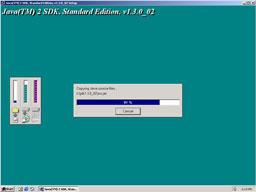
The window which reports progress will be displayed.
Java interpreting environment will be set up.
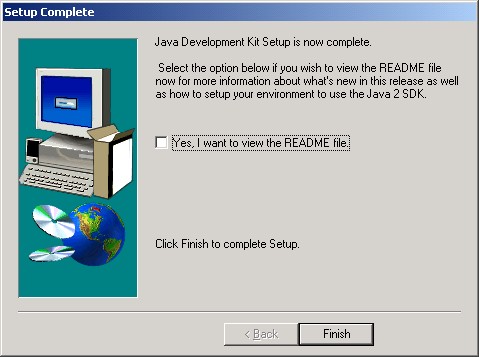
The installer poses a question to read " README " file after the installation is done. This is an option. Click " Finish " to finish the installation.
The outline of the directory tree after of Java2 SDK is shown below.
C:\JDK1.3.0_02
|-bin
|-jre
|  |-bin
|  |-lib
|-lib
|-include
|  |-win32
|-demo
To compile in Java, it is needed that PATH includes " bin " directory above. In this example, it is shown as " C:\JDK1.3.0_02\bin ". Append the " bin " directory beneath the installed Java to the PATH variable. To reflect this change, your PC must be rebooted. If you feel it difficult to change PATH, refer to Chapter 2 Section3.1.
Type;
in command prompt to examine if the setup was done properly. Refer to installation notes by Sun Microsystems if error messages appear. ( http://java.sun.com/j2se/1.3/install-windows.html)C:> javac C:> java -version
Installation of Cygwin is strongly recommended, and it is a UNIX emulation environment on Windows, to make new simulation by E-CELL2. Cygwin will be needed to execute some Perl scripts or programs attached to E-CELL2. If you already have installed Cygwin, please make sure that Perl, is available. If you don't have Perl program, down-load its binary or source codes. From http://www.ring.gr.jp/archives/pc/gnu-win32/release/perl.
The latest information about Cygwin can be obtained from the web site of RedHat, Inc. (http://sources.redhat.com/cygwin/).
Install Cygwin from CD-ROM(select "Run this program from the location " and click " OK ")
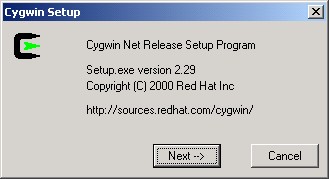
Click the link above to run setup.exe, or the Cygwin installer. It is shown us the icon below in the CD-ROM. You can start installation by clicking this icon of Cygwin.

The Cygwin installer starts up. Click " Next " to start installing it. Click " Cancel " to stop installing it.
Select the way of installation. Here, select " Install from Local Directory ". The installation is carried out using the Cygwin package contained in the CD-ROM.

Select the directory name " Cygwin " inside the CD-ROM drive by clicking &qupt; Browse " button. The directory "E:\Cygwin" is selected in this example.

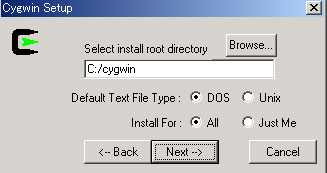
Select the location for Cygwin installation. At the question for " Default Text File Type ", the line-feed code can be chosen for Cygwin. The item " DOS " indicates " CR+LF " and the item " UNIX " means " LF " for the line-feed code. Choose DOS this time at the " Default Text File Type ".
Select " All " to make Cygwin available for all users. Select " Just Me " to allow only you to use Cygwin.
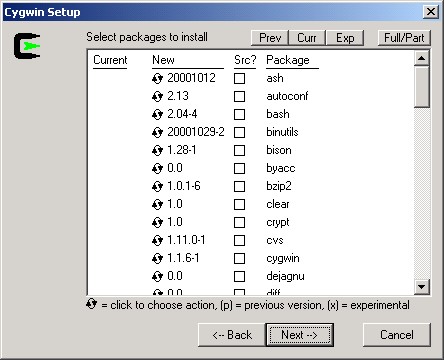
Select the packages for this installation. It is not required to change the default setting this time.
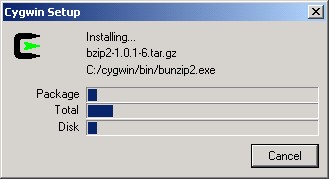
Installation starts and selected packages are extracted from the archives.
It is possible to create the desktop icon and add up Cygwin to the start menu. Check them if you don't have the reason.
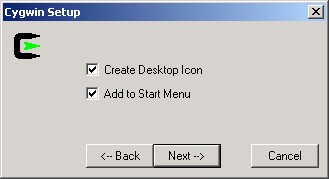
Click " OK " to finish installation.

Try starting up Cygwin. Select [Start]-[Program Files]-[Cygnus Solution] - [Cygwin Bash Shell] to execute (Windows 2000) or click Cygwin icon on the desktop.
Cygwin console window will be displayed by clicking it.

Type
to quit Cygwin. The letter " % " is an example of the prompt, indicating that Cygwin is ready to accept the user's commands. The appearance of this prompt depends on the user's environment.% exit
To use Cygwin, refer to Cygwin's tutorial ( http://cygwin.com/cygwin-ug-net/cygwin-ug-net.html).
Borland Software Corporation. provides Borland C++ Compiler, a compiler which can be used at the command line, for free to develop Win32 applications. This compiler will be needed for the user to develop or add their own reactor. Pass this section in case you have already installed Borland C++ compiler 5.5.1 or C++ Builder 5.0. Note that current version of E-CELL2 can not be compiled using C++ Builder 6.0.
The latest version of Borland C++ Compiler is 5.5.1.
To use the English version, you have to start up its installer after downloading it from Borland Software Corporation. web site ( http://www.borland.com/products/downloads/download_cbuilder.html)after user registration.
To use the Japanese version, install it from CD-ROM or install it after downloading it from Borland Software Corporation. web site ( http://www.borland.co.jp/cppbuilder/freecompiler/)after user registration. If it is installed from CD-ROM, click the link below.
Install Borland C++ Compiler (Janapese version) from CD-ROM
(Select " Run this program from the location " and click " OK ")
If the compiler is not installed from the link above, click the icon below in CD-ROM to start up the Borland C++ Compiler installer.

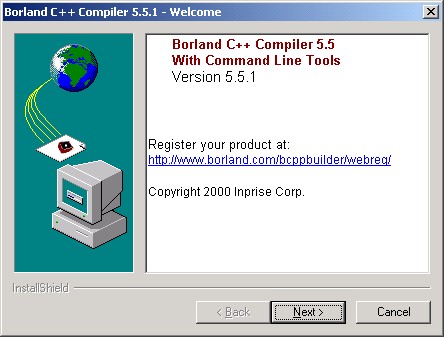
Click " Next " button to start the installer up. Click " Cancel " button to cancel the installation. All figures.
Enter the folder where the Borland C++ Compiler should be installed. Click " Browse " button to specify the destination if you want to select it from the directory tree.
Jot the directory path for this installation because it will be needed to set up Borland C++ Compiler later.

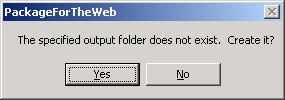
If the specified folder does not exist, you will be asked to create it. Click " Yes " to create the folder if there is no problem.
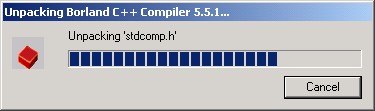
The package of Borland C++ Compiler is being unpacked.
After the package is delivered successfully, the dialog window, notifying completion of this installation is displayed. Click " OK " to finish the installation.
In order to use Borland C++ Compiler, it is necessary to set up configuration files and
environment variables appropriately further.
The directory " Bin " is under the directory Borland C++ Compiler is installed. Setting
files bcc32.cfg and ilink32.cfg must be created and settled in this directory.
Setting up bcc32.cfg file. The compiler of Borland C++ Compiler is set up by the description here. Refer to the explanatory of C / C++ programming about the action of a compiler. "-I " option is used to specify " include ", which is a subdirectory of the directory which Borland C++ Compiler is installed. Specification of subdirectory " lib " and " lib/PSDK " is performed using " -L " option. Please do not forget to bundle the contents of each option with " " at this time.
Borland C++ Compiler performs the compile optimized by Windows2000 by the default. If OS of your PC is WindowsNT or Windows 98,
be sure to add description below.-DWINVER=0x0400 -D_WIN32_WINNT=0x0400
Setting up ilink32.cfg file. Linka of Borland C++ Compiler is set up by the description here. Since " -L " option is described also here, describe it as the window before similarly.
The set-up contents become effective after rebooting a computer. Before the setup of E-CELL2.20, reboot your PC.
You want more information about Borland C++ Compiler, please see the below web site.
(
http://www.pharo.onlinehome.de/Bcc55.html)
Installation to " C:\E-CELL2 " is assumed in E-CELL2.20. If it is not installed in the standard directory, please read the following instructions carefully against your directory for E-CELL2.20. Since this software is not internationalized, please do not install it along the directory path containing non US-ASCII characters.
In this installation, the following directories are delivered from the installer by default, under the specified directory. (C:\E-CELL2).
C:\E-CELL2
|-erythrocyte (erythrocyte model)
|  |-DLLR
|  |-DLLRB
|  |-ECELL
|  |-GLIB
|  |-SRCC
|  |-SRCJ
|  |-WIN-BCC
|-standard (standard reactor)
|  |-DLLR
|  |-DLLRB
|  |-ECELL
|  |-GLIB
|  |-SAMPLE
|  |  |-rule_template
|  |  |-sample
|  |  |-simple
|  |-SRCC
|  |-SRCJ
|  |-SRCR
|  |-WIN-BCC
|-tools (tools for supporting modeling)
    |-rule
    |-reactor
In the erythrocyte model and the standard reactor model, since the lineup of equipped reactors differs, they are divided and stored in " erythrocyte " and " standard " directories, respectively. Use each model properly according to your purpose. In Chapter 2 and following ones, how E-CELL2 is manipulated is explained.
Now, click the following link to install E-CELL2.
Install E-CELL2.20 from CD-ROM
(Select " Run this program from the location " and click " OK ")
Or click the following icon in CD-ROM to start up the installer.

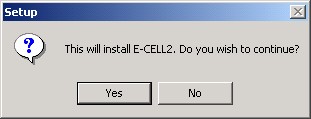
After the installer of E-CELL2 starts, click " Yes " to start installation. Click " No " to cancel installation.
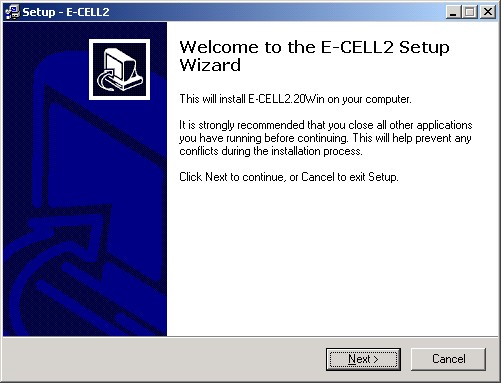
The setup wizard of E-CELL2 appears. Click " Next " to progress.
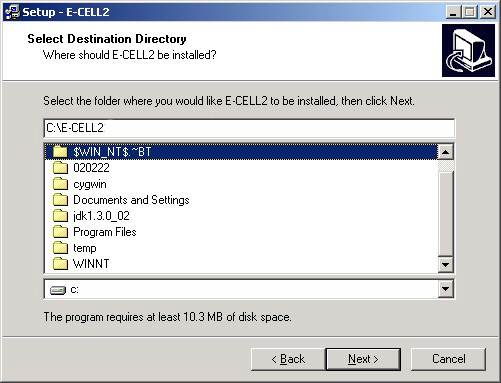
Select the folder where E-CELL2 is to be installed. Although the destination folder can be chosen by clicking " Browse " button, it is encouraged to choose the default directory " C:\E-CELL2. " If it is installed in another directory, it becomes impossible to use the desktop icon, which can be created at the next step. (Start Cygwin in that case and by using the command " cd ", enabling you to change the current directory, containing the batch file of E-CELL2). If the directory path includes non US-ASCII characters, E-CELL2 does not work.
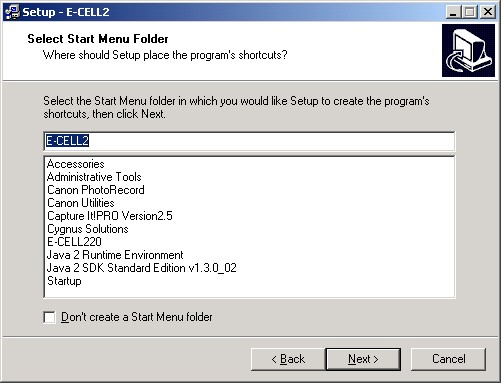
E-CELL2 for the standard-reactor model can be set up so that it starts from [ Start] menu of Windows. This step will be skipped if the check box " Don't create a Start Menu folder. " Is selected. Click " Next " to progress to the next step.
A desktop icon for starting up E-CELL2 can be created. Create it if needed.

This is the step to confirm setting conditions. If satisfactory, click " Next " button to start installation.

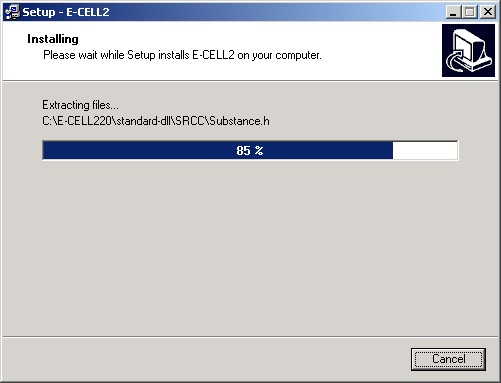
The status of installation shown in a progress bar.
Click " Finish " button to complete installation. Check the check box to start E-CELL2 of the GUI version immediately after installation.
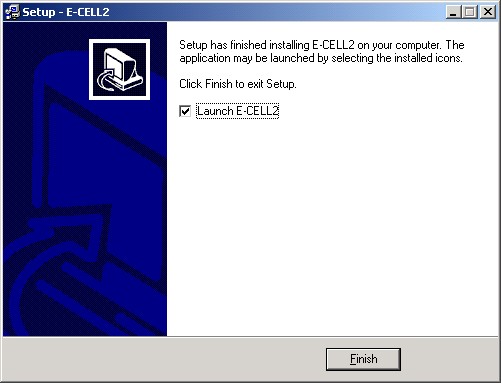
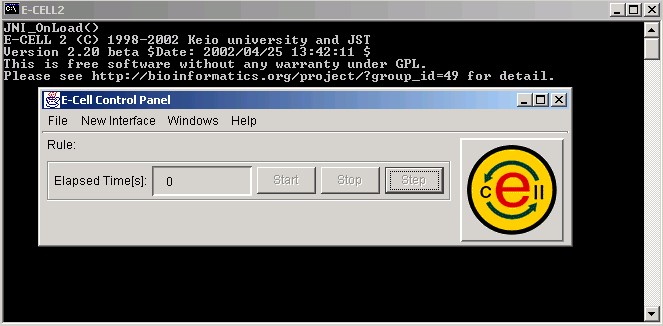
If the check box is checked, E-CELL2 for the standard-reactor model will start automatically after installation. The concrete operations are method is explained subsequent to Chapter 2.
If the way for creating the shortcut to E-CELL2 is chosen, the shortcut for the standard-reactor model is made on the desktop.

The explanation about the setup of E-CELL2 is finished. Let's progress to Chapter 2 and learn about the practical operations.
|
|
E-CELL2 User's Manual
Last Update $Date: 2002/07/16 16:45:42 $. Copyright: Keio University and Mitsui Knowledge Industry Co., Ltd. 2002 |
Chapter 1 Installation [ Chapter 2 : Chapter 3 : Chapter 4 : Chapter 5 ][ Top ] |