[Chapter 1:Chapter 2:Chapter 3:Chapter 4:Chapter 5][Top]
| E-CELL2 User's Manual | Chapter 6 Modeling Launcher [Chapter 1:Chapter 2:Chapter 3:Chapter 4:Chapter 5][Top] |
While *.er files are the RULE files of E-CELL2 written in text format, *.eri files are in E-CELL2 executable format. Details can be found in Chapter 4 of the user's manual (Creating Rules section).
*.rd files are the Reactor files of E-CELL2. Details can be found in Chapter 5 of the user's manual (Creating Reactors section).
Sets the paths to the programs and scripts, and the directories for saving the files. A warning message will be displayed if the target directory do not exist. If left blank, the directory of this launcher program will be used.
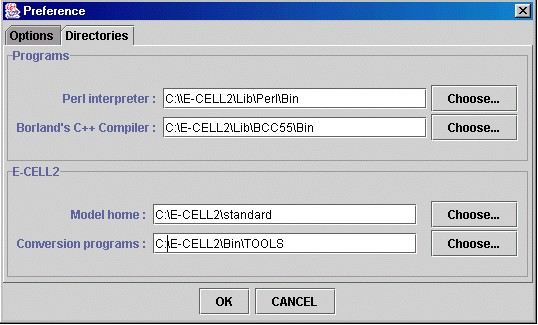
1.2.1 Path settings (Programs)
Creates a new model directory.
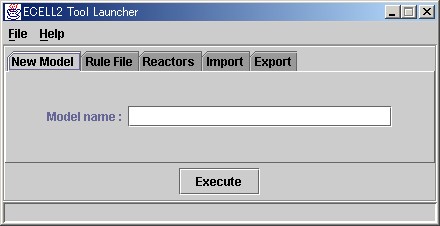
Input the name of the model to create in the input field and press Execute to copy the temporally stored data (under Template directory) to that directory. The Model directory set at the Preference window will be changed with the execution of this process.
Creates an ERI file from a spreadsheet or an ER file.
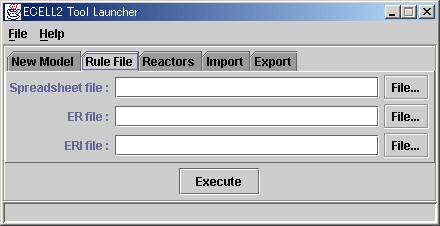
3.1.1 Spreadsheet file
Select the spreadsheet file via its path by directly typing its location or by browsing for the target by the "File..." button on the right. If the path is omitted, the Model directory set at the Preference window will be used. The process will terminate with a warning message if the target file do not exist.
Select the .er file via its path by directly typing its location or by browsing for the target by the "File..." button on the right. If the path is omitted, the Model directory set at the Preference window will be used.
Select the .eri file or the path itself by directly typing its location or by browsing for the target by the "File..." button on the right. If the path is omitted, the Model directory set at the Preference window will be used. If only the path is designated, files will be created with the input spreadsheet (or the .er) file name with an .ERI extension. Model directory set at the preference window will be used if the field is left blank. A warning message will be displayed on overwriting existing files. The process will terminate with a warning message if the set directory do not exist.
Choose the input file under the following rules:
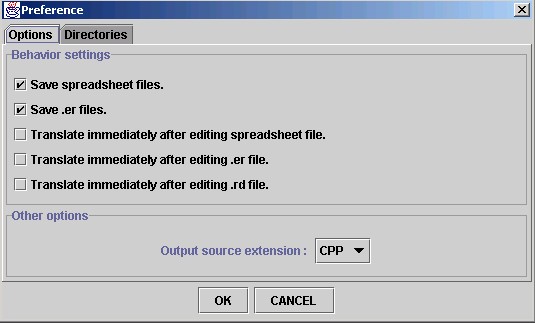
If either "Translate immediately after editing spreadsheet" or "Translate immediately after editing .er file" is checked, the .eri conversion process will start immediately after each editing window is closed.
Set the filename or the directory name for the output .eri files according to the data inputted. .ERI files with inputted filename and directory (if any) will be created. If left blank, the file will be created under the Model directory set at the preference window. If the selected filename do not exist, a new file will be created with that name. A warning message will be displayed if the selected directory do not exist.
Clicking the Execute button starts the conversion process. The log of the process will be displayed in the message window during the process with errors if any (where the process will be terminated at that point). If the error occurred while script execution, the error details will be in the message window.
Creates the Reactor source files (C/C++ and header files) and DLL from .rd files.

Select the .rd file via its path by directly typing its location or by browsing for the target by the "File..." button on the right. If the path is omitted, the RD directory under Model set at the Preference window will be used. The process will terminate with a warning message if the target file do not exist. If the filename is omitted, all .rd files under the target path will be converted.
Designate the input .rd file via its path. A warning message will be displayed during the conversion process if non-existing files are selected. The RD directory under the Model directory designated under the Preference window will be chosen if the path information is not included in the input.
If a directory name is selected, all .rd files under that directory will be converted. If no input, the RD directory under the Model directory in the Preference window will be the target.
If "Translate Immediately after editing .rd file" is checked in the Preference window, Reactor file conversion process will start immediately after closing the editor window.
Conversion Process will start when the Execute button is pressed. Log will be displayed in the message window during the conversion process. The process will terminate with a warning message if an error occurs during the process. If the error occurred when loading script, error details will be displayed in the message window.
Note that the Makefile for creating Reactor modules is required for this conversion process to succeed. A warning message will be displayed if this Makefile do not exist under the DLL output directory set at the Preference window. Please also make sure that the permission settings for the Makefile is set in writable mode, for the list of the Reactor modules (DLL) to be created will be appended to the file under the DLLFILESR section.
This process creates the Reactor source files in the format set at "Output source Extension" in the Preference window. The extensions for the header files are always .h.
Reactor Source files and DLL files will be saved under the directories set at the Preference window.
Imports models that are created externally to this system.
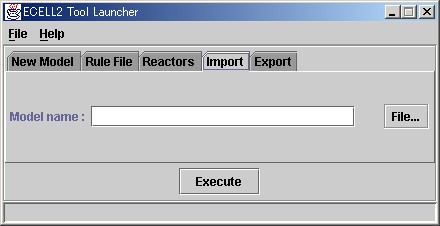
Designate the location of the .jar file of the model to import via its path, by directly typing its location or by browsing for it using the "File..." button on the right. The installation directory of E-CELL2 will be chosen if only a file name is designated.
Designate the input .jar file via its path. If a nonexistent file name is designated, a warning message will be displayed upon execution, and the import process will not be executed.
The import process will start when the Execute button is clicked. A log will be displayed in the message window during the import process. If an error occurs during the import process, a warning message will be displayed and the process will be terminated.
This process creates a new directory with the name of the imported model, under the installation directory of E-CELL2.
Exports models that are created by this system so that they can be loaded by other E-CELL2 users.

Designate the directory of the model to export by directly typing its location or by browsing for it using the "File..." button on the right.
Designate the directory of the model to export. If a nonexistent file name is designated, a warning message will be displayed upon execution, and the export process will not be executed.
The export process will start when the Execute button is clicked. A log will be displayed in the message window during the export process. If an error occurs during the export process, a warning message will be displayed and the process will be terminated.
This process creates a model archive file in ".jar" format under the installation directory of E-CELL2.
Two simple editors and one viewer window is included in this launcher.
Each window has a common command set of the following:
1. Save File
Saves the edited (or displayed) text onto a file. If the file was newly created, a file selection dialog will open during save. The editing file will be the save target elsewise. When in message viewer mode, the displayed text file will be saved. A file selection dialog will always appear in this mode. A warning message will be displayed on overwriting existing files.
2. Refresh
Performs an "undo" and refreshes the data back to its saved or last opened position. When in message viewer mode, any displayed message will be cleared. If any changes were to be made to the saved data, A warning message will be displayed before altering the data.
Simple editor to edit CSV files in tab format.

Right-clicking inside the cell displays the following menu:
Simple editor for editing files in text format.

Message window to display errors and process logs. Read only.

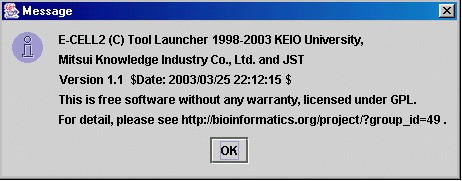
Displays the version of this launcher.
| E-CELL2 User's Manual Last Update $Date: 2003/3/25 $. Copyright: Keio University and Mitsui Knowledge Industry Co., Ltd. 2000-2003 | Chapter 6 Modeling Launcher [Chapter 1:Chapter 2:Chapter 3:Chapter 4:Chapter 5][Top] |